|
ISSUE NUMBER 3 |
HISTORICAL MINIATURES BY GEORGE GRASSE |
FEBRUARY 2009 |
HISTORICAL MINIATURES JOURNAL ISSUE NUMBER 3
PUBLISHED BY GEORGE GRASSE
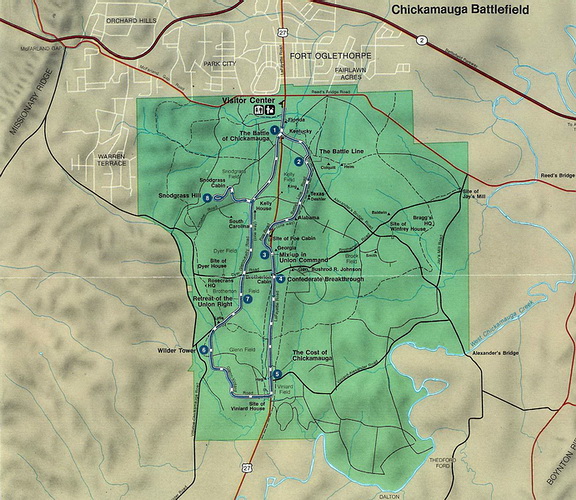
PHOTO TOUR OF THE BATTLE OF CHICKAMAUGA 1863
By George Grasse
SEE RECOMMEND READING LIST AT THE END OF THIS ARTICLE
 |
 |
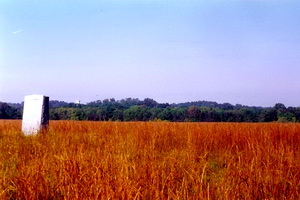 |
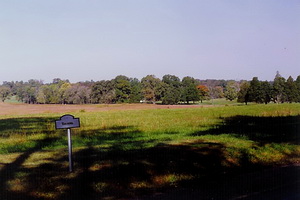
| VINIARD'S (Site 5 on the Park Map) THE GLENN FIELD (Northwest and directly across the road from Viniard's). Viniard's was the center of the Union right flank on both days. This view is looking southeast. The Lafayette Road is just off to the right. Woods to the left, right, and front covered the Confederate infantry assault in this area. The center photo is taken from Wilder Tower at the far western end of Glenn Field looking across to Viniard's Field at the top. Lafayette Road runs along the open ground at the top of the photo this side of the far woods except the small indentation which is Viniard's Field on the other side of the road. Wilder Tower was constructed to commemorate the stand made by Colonel Wilder's mounted First Brigade of Reynold's Division which did much to save the Union right flank. The third photo shows the marker that represents the spot in Glenn Field where the Confederate advance in this area on the second day was halted by Wilder's Brigade. The tower can barely be seen to the right of the marker just above the tree line. This view looks West. | ||
 |
 |
 |
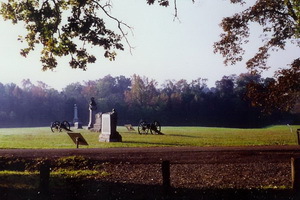
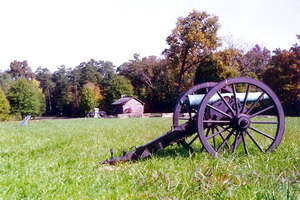
| KELLY HOUSE & FIELD (On the Park Map between 2 and 3 on the Lafayette Road). This is a reconstructed cabin is representative of the site of the Kelly Farm. The the left of the cabin at the edge of the photo runs the north-south Lafayette Road. This view is north. The two representative cannons are off to the right out of view in the cabin photo. The guns are turned north to support the Union counter-attack in the morning of the second day against Polk's Corps which turned the flank. The right-hand photo show two representative Confederate howitzers of a force that eventually broke through the southeast corner of Kelly field on the second day. The Confederate infantry would be advancing towards you and into the massed battery across the Lafayette Road which killed and wounded nearly 300 of this force before retiring. | ||
 |
 |
|
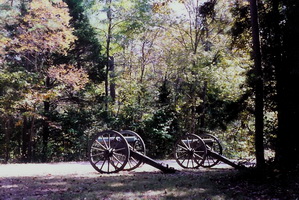
BROTHERTON CABIN (left photo is
Site 4 on the Park Map) This is the
spot of Longstreet's breakthrough. A small ridge ran parallel
to Lafayette Road which runs from left to right in front of the far
woods. The Union line ran along this ridge from the vicinity
of the Brotherton cabin and then extended well to the right on high
ground. Both flanks were anchored by woods. The problem
was the Confederate assault columns used the woods to the Union
front as cover and simply rushed onto the road and over the high
ground suffering few casualties and breaking the Union center at
this point. THE TANNERY AND DYER FIELD (right photo is directly behind the Brotherton line west of Site 4 on the Park Map on the edge of Dyer Field). This view is looking northwest towards the slightly higher wood line in the distance called Horseshoe Ridge where the Snodgrass Farm was located. It would become the site of General Thomas' stand in the late afternoon of the second day. The open ground is Dyer Field. In this vicinity, the Union Army made a brief stand. |
|
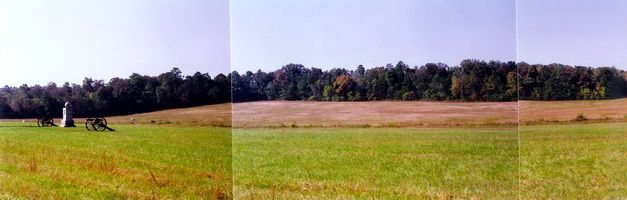 |
| VIEW OF LYTLE'S HILL AND THE VICINITY OF ROSECRAN'S HQ (this composite photo was taken from behind The Tannery looking southwest. Rosecran's had his army HQ on the "hill" at the far right. At the moment the "Tannery" line collapsed, behind you, this field was covered with retreating Union soldiers trying to take cover behind the hill into the woods. At this moment, Brigadier General Lytle's First Brigade of Sheridan's Division came up through the woods in the left-center and deployed along the wood line on the hill. They offered substantial resistance to the advancing Confederate battle line now moving across the field. General Lytle was mortally wounded here and died later. His brigade was flanked through the woods on the left by those Confederate troops originally held up by Wilder's Brigade in the Glenn Field just over the left horizon. |
 |
 |
 |
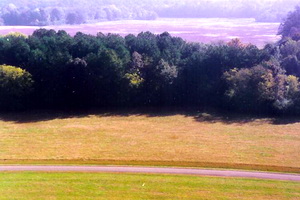
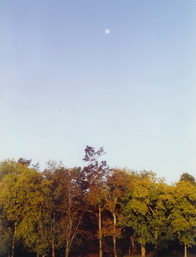
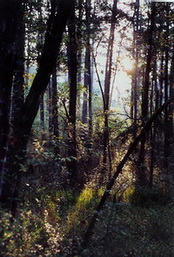
| WOODS These are scenery photos illustrating the dominating nature of woods in this battle. Woods adjacent to the few farms in the area were fairly devoid of secondary growth because farm animals were allowed to graze. Deeper areas were in fact similar to these photos. | ||
 |
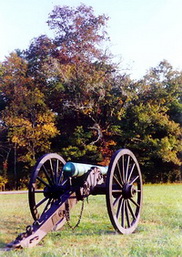
| 3-INCH ORDNANCE RIFLE - In general, American Civil War armies equipped their field artillery batteries in different ways. Confederate batteries usually had four guns of mixed type, i.e., 2 howitzers, 1 smoothbore Napoleon, and 1 rifle. Union batteries had six guns usually of the same type, i.e., 6 Napoleon smoothbores or 6 rifles. This 3-inch Ordnance Rifle barrel is authentic but may not have fought here. The carriage is made of steel for durability. Note the absence of implements. The woods in the background probably come close to what they looked like during the battle. Note the somewhat open nature of the secondary growth. |
I TOOK THESE PHOTOS IN OCTOBER 1992
---------------------------------------------------------------------------------------------------------------------------------
RECOMMEND READING LIST
The Civil War in the West From Stones River to Chattanooga, Peter Cozzens, illustrations by Keith A. Rocco, University of Illinois Press, Urbana and Chicago, first paperback edition, 1996. Three volumes: No Better Place to Die, Stones River, The Terrible Sound, Chickamauga, and The Shipwreck of Their Hopes, Chattanooga.
Tullahoma: the 1863 Campaign for the Control of Middle Tennessee, Michael R. Bradley, Burd Street Press, Shippensburg, PA, 2000.
Chattanooga - A Death Grip on the Confederacy, James Lee McDonough, The University of Tennessee Press, Knoxville, 1984.
Mountains Touched with Fire - Chattanooga Besieged, 1863, Wiley Sword, St. Martin's Press, New York, 1995.
Blue & Gray Magazine devoted several issues to the Tullahoma, Chickamauga, Chattanooga Campaign. Consult their website: www.bluegraymagazine.com.
---------------------------------------------------------------------------------------
GO TO?