
|
ISSUE NUMBER 3 |
HISTORICAL MINIATURES BY GEORGE GRASSE |
FEBRUARY 2009 |
HISTORICAL MINIATURES JOURNAL ISSUE NUMBER 3
PUBLISHED BY GEORGE GRASSE
MODELING TIPS
MILITARY MINIATURES
Tip 11) I keep a number of hand twist drills "loaded" with drill bits of varying size so when they're needed, I don't have to switch bits out of one twist drill and insert another twist drill. I keep about six "loaded" in different sizes within easy reach. I try and match the drill bit size to the brass rod size I most commonly use. See Figure 1 below.
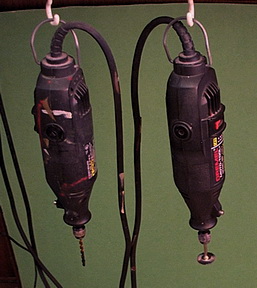
Tip 12) I keep two Dremel tools "loaded" for the most common work, one with a 1/8" drill bit for drilling holes for vignette scenery material and one with a #428 wire brush for buffing and cleaning metal figures. See Figure 2 below.
Figure 1 - Twist Drills Figure 2 - Dremel Tools
WORLD WAR I AVIATION MODELING IN 1:48 SCALE
Tip 13) Making seatbelts is simple and passes as substitutes if your kit does not have them. See Figure 3 below to follow these steps. First, from a piece of spare lead foil, but thin strips to a width appropriate for the seatbelts in your aircraft model. Some seatbelts are thin and some are especially wide. For the next step, I use copper wire from standard electronic speaker wire. Cut off a length of 6 to 8 inches, remove the shielding, and pull out the strands. To make an approximation of the buckling hardware on a seat belt, cut off 3/4" of copper strand and fold in half. Next, grab the apex of the wire with one set of pliers and make one twist so that you form a loop. This loop can remain open for one side or crimped closed and folded over so simulate a hook for the other side of the seat belt. Bend the wire to form 90 degree angles that correspond to the width of the seat belt strap. Cut off the ends leaving about 1/8" to fold back into the belt. Pass the lead foil strap through the base of the buckle, crimp with pliers, apply a drop of super glue to the edges, and you have a seat belt.
Tip 14) Making struts is necessary if you want to replace kit struts and you don't have third party pre-made strut material. I use brass tubing into which I super glue brass rod studs to fit the holes in the wing to take the strut. The trick is finding the correct brass tubing with the appropriate inside diameter to take the brass rod. One alternative, before I continue, is shown in Figure 4 below, and that is the end is cut and sanded to a taper finish but you need a sizeable hole in the wing to accept the larger projecting tip. Back to the "rod in tube" method. One consideration of the tube size is how it will look when hammered down (flattened out) to look like a strut. Once you decided all of these things, proceed by cutting off two inserts show in Figure 4 on the far left. Cut a piece of tubing to length (first piece of tubing from the left). Insert the the two rods, one at each end and apply a little super glue to hold. Don't worry about their exposed length which can be trimmed when you are set to glue the struts to a lower wing. Lastly, place the subassembly on an anvil and gently beat the tubing down (second strut from the right in Figure 4). The last strut shows the "insert" method at the top of the strut and the "taper" method on the bottom of the strut. Not especially accurate or pretty but provides maximum strength.

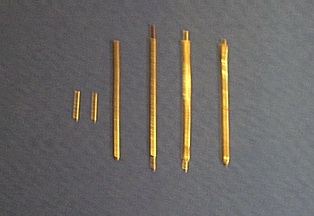
Figure 3 - Seatbelts Figure 4 - Struts
---------------------------------------------------------------------------------------------------------------------------------
GO TO?