 |
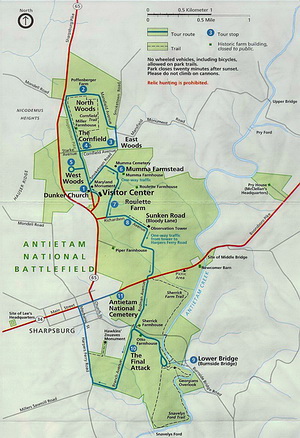
| ANTIETAM NATIONAL BATTLEFIELD PARK MAP. Each of the numbered stops (blue circles) on the park map above have a corresponding photograph (below) taken on my visit to the battlefield in September 2007. |
|
ISSUE NUMBER 6 |
HISTORICAL MINIATURES BY GEORGE GRASSE |
NOVEMBER 2009 |
HISTORICAL MINIATURES JOURNAL ISSUE NUMBER 5
PUBLISHED BY GEORGE GRASSE
PHOTO TOUR OF THE BATTLE OF ANTIETAM (SHARPSBURG) 1862
By George Grasse
|
|
| ANTIETAM NATIONAL BATTLEFIELD PARK MAP. Each of the numbered stops (blue circles) on the park map above have a corresponding photograph (below) taken on my visit to the battlefield in September 2007. |
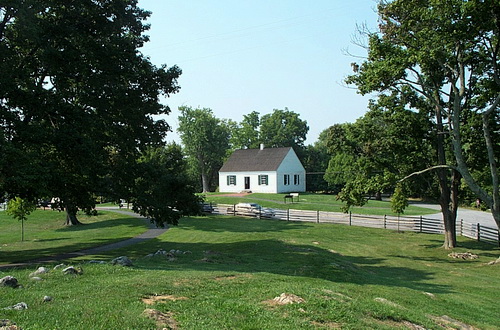 |
| STOP 1: DUNKER CHURCH . This view is looking west. The Visitor Center is to the left rear (off camera). The fence-line borders the Hagerstown Pike. To the left, the pike goes into Sharpsburg. To the right, the pike goes past the Miller Cornfield and towards the North Woods. The area behind and to the right of the church is the West Woods. |
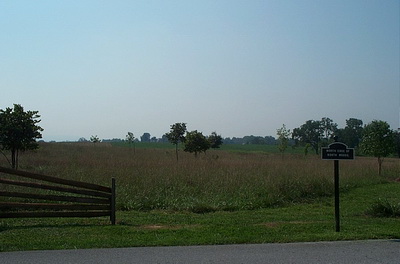 |
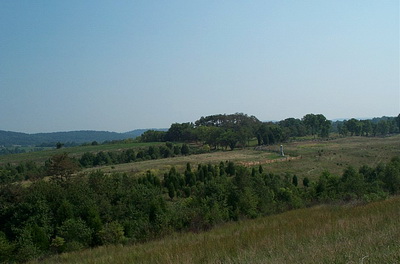
| STOP 2. THE NORTH WOODS . This view from the north edge of the North Woods looks to the Confederate line which lies near the distant trees. The small saplings in the foreground mark the general area of the North Woods which screened the advance of the first Union troops to begin the battle: Hooker's I Corps. |
 |
 |
| STOP 3. THE EAST WOODS - ALONG CORNFIELD AVENUE. The left photo looks to the northwest with the Miller Cornfield generally in the middle distance and the North Woods out of sight to the far right. Hooker's I Corps was attacking from right to left. This immediate area was the initial battleground for Mansfield's Union XII Corps which would be advancing on either side of this park road heading to the left side of the photo. Later, Mansfield would divert much more to the south (left) as Sumner's II Corps was committed here. Driving down the road (to the left), the photo on the right was taken looking at some of the re-growth of the East Woods. Both elements of Hooker's I Corps and Mansfield's XII Corps would have emerged from the present day woods area. | |
 |
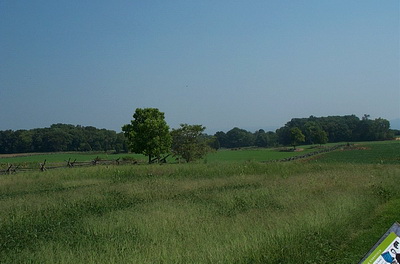
| STOP 4: THE MILLER CORNFIELD. This view is taken from Cornfield Avenue looking northwest. The Miller Farm is on the far right and the line of distant trees roughly marks the Hagerstown Pike. Some of Hooker's I Corps would be emerging from the East Woods behind and to the right of the camera. This area was defended by Hood's Confederate Division all the way to the Hagerstown Pike. The "thicker" bunch of trees on the left across the Hagerstown Pike marks the West Woods where more of Jackson's Corps (Ewell's Division and Jackson's Division commanded by Winder) were located. |
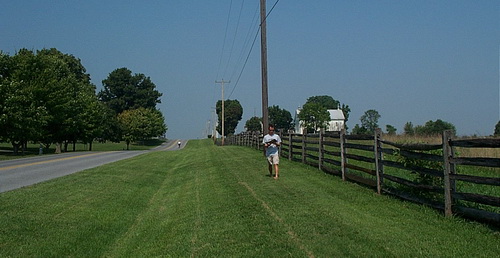 |
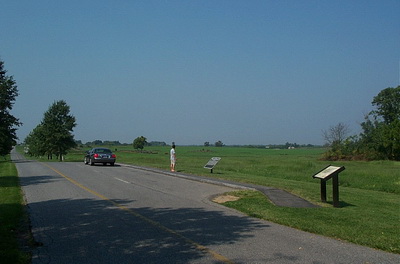
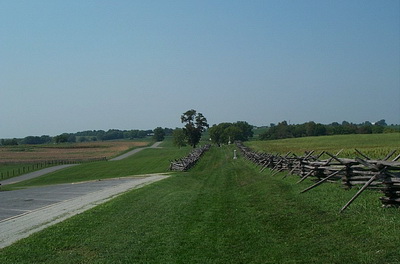
| STOP 5. THE WEST WOODS. After completing the drive west along Cornfield Avenue, you intersect the Hagerstown Pike near the top of the rise and continue over it into the general area of the West Woods on the far left. This photo was taken after our visit there near the intersection of the Smoketown Road and Hagerstown Pike. The view is looking north. My son Scott is walking along the fence line. |
 |
| STOP 6. MUMMA FARMSTEAD. This view is taken |
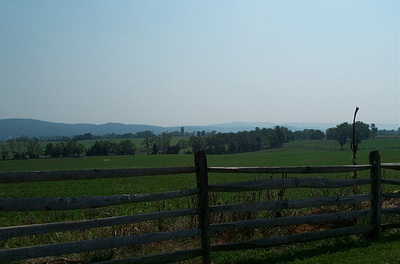 |
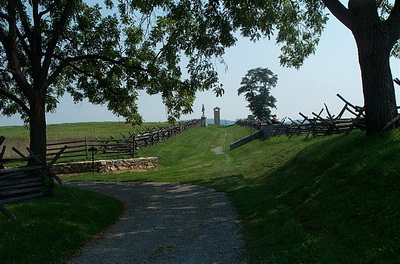
| STOP 7: ROULETTE FARM. This photo was taken on the Roulette Farm looking directly at the tower which stands on the east flank of the Sunken Road. South Mountain is in the distance. Brigades of Richardson's Union infantry division including the Irish Brigade crossed this ground to attack the Sunken Lane. |
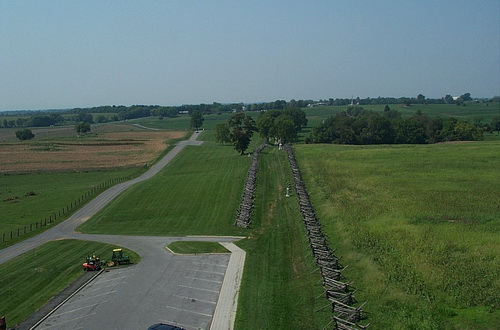 |
| STOP 8: THE SUNKEN ROAD (BLOODY LANE). This photo was taken from the tower and looks to the northwest. Confederate infantry lined the lane facing to the right over an open field where the Irish Brigade advanced. French's Union Infantry Division advanced from ground beyond the near trees. See additional photos below. |
 |
 |
| STOP 8: THE SUNKEN ROAD (BLOODY LANE) - Continued. The left photo was taken from the Confederate left looking down the lane towards the tower. The Union Irish Brigade attacked the lane from the left side of the photo across the open field and parallel to the lane. The right photo was taken near the base of the tower on the Confederate right. The Union Irish Brigade attacked from the right across the open field parallel to the lane. In the far distance is the Visitor's Center. The Dunker Church is behind the center out of sight. | |
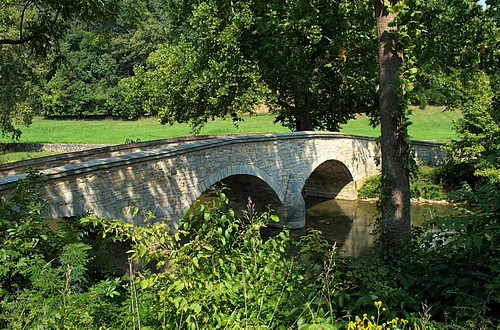 |
| STOP 9: LOWER (BURNSIDE) BRIDGE. This photo was taken from the West side of Antietam Creek just below the position slightly down-slope from the Confederate battle line. See two more photos below. |
 |
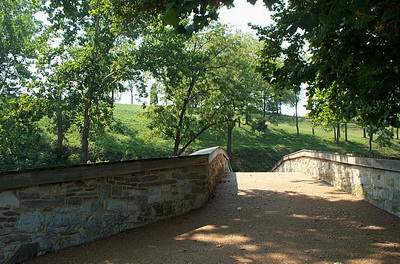 |
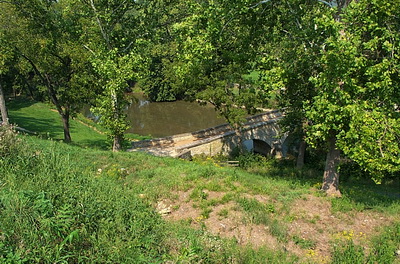
| STOP 9: THE LOWER (BURNSIDE) BRIDGE - Continued. The left photo was taken from visitor's path and illustrates the field of fire that the Confederate infantry had when the narrow Union assault column attacked. The photo on the right is the view an attacking Union infantryman would have as he rushed across the bridge to get to the heights above which were lined with Confederate infantry. The general area of the bridge flattens out to the north from which direction the Union lines were located. The ground to the south of the bridge maintains this rather narrow space which the Confederates thought would not be crossed. In fact, had Burnside reconnoitered with more determination, he would have found several spots undefended and easily fordable. | |
 |
| STOP 10: THE FINAL ATTACK. This photo was taken from the general area where Burnside made a second crossing south of the bridge. This was the threatening move countered by the fast-arriving, tired, and depleted "Light" Division of General A. P. Hill whose action stopped Burnside and effectively ended the battle. Union troops would be parallel to the ridge on either side of the marker facing in the general direction towards the lower right corner in this photo. |
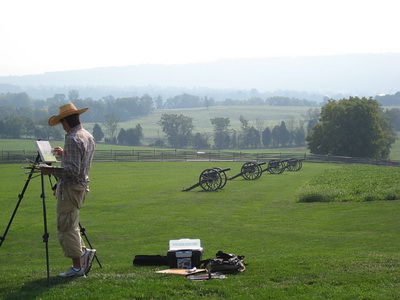 |
| THEN AND NOW. An artist paints a now tranquil scene. The view is roughly to the East from the rear of the Visitor's Center. This photo was taken by my son, Scott. |
I TOOK THESE PHOTOS IN SEPTEMBER 2007
---------------------------------------------------------------------------------------------------------------------------------
BIBLIOGRAPHY
Adelman, Garry E. and Timothy H. Smith. Antietam Then & Now. Gettysburg, PA: Thomas Publications, 2005.
Antietam Battlefield, Sharpsburg, Maryland, 1862. Olean, NY: McElfresh Map Co., 1994.
Blue & Gray Magazine Editors with Stephen W. Sears and James V. Murfin. History and Tour Guide of the Antietam Battlefield, The General's Books, 1995.
Collier, Mark C. Mapset for the Morning Phase of the Battle of Antietam (Sharpsburg) Md., Sept. 17, 1862. Collier Mapping, Bridgewater, VA, 1998.
National Park Service, Antietam National Battlefield brochure, Sharpsburg, Maryland. All photos were taken from National Park Service property
GO TO?