HISTORICAL MINIATURES JOURNAL ISSUE NUMBER 16
PUBLISHED BY GEORGE GRASSE
THE BATTLEFIELD AT NEW MARKET IN THE
SHENANDOAH VALLEY
FOUGHT 15 MAY 1864
 |
|
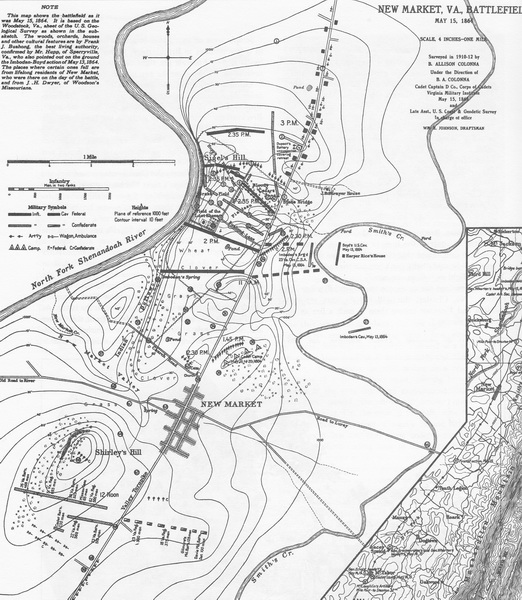
The image above is taken from a reproduction of the
article "The Day at New Market" written by William C. Davis for
Historical Times Inc., 1971. It represents the map drawn by
Benjamin Colonna and published in 1914. Cadet Colonna was the
2nd Captain of Company D, Virginia Military Institute Cadet
Battalion, and, at the age of 20, fought at New Market on 15 May
1864. The map is an accurate topographical representation of
the battlefield and surrounding area. It includes several
troop dispositions during the course of the battle. At the
bottom left hand of the map is Shirley's Hill, the most dominating
feature of the immediate area. Behind it (south) is shown the
initial Confederate deployment. The first Union position is to
the north just beyond and west of New Market town. |
 |
|
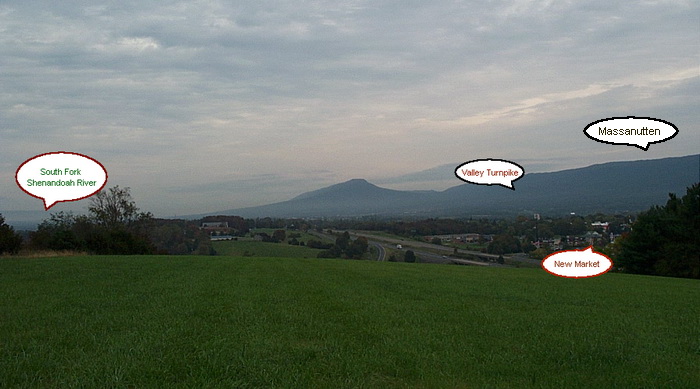
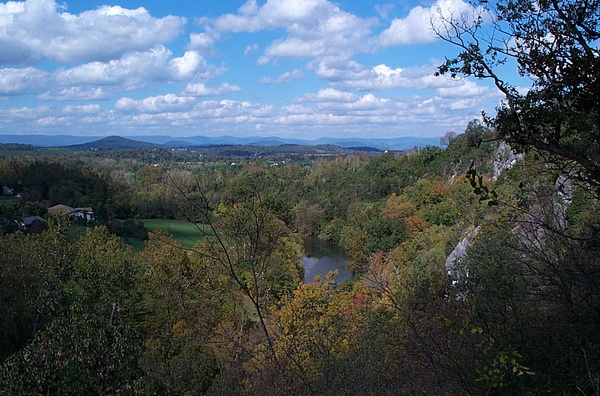
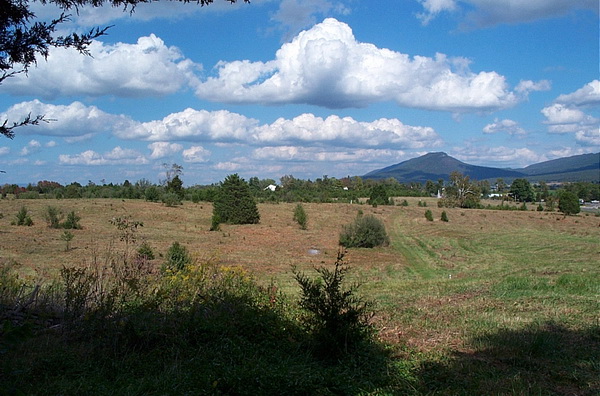
Photo #1: This view is taken from just behind
the crest of Shirley's Hill looking north. The width of the
battlefield is defined by the South fork of the Shenandoah River, on
the left, and the great Valley Turnpike, on the right. The Battle of New Market was fought
on 15 May 1864 largely as a result of Sigel's Army of West Virginia moving up,
or south, of the
Shenandoah Valley in concert with The Army of the Potomac's move south and into
the Wilderness. The primary objective set forth by General U. S. Grant,
commanding ALL U. S. armies, was to prevent Confederate forces in the Shenandoah
Valley from reinforcing General Lee's Army of Northern Virginia AND to escort a
large re-supply wagon train to Staunton where two Union cavalry commands were to
assemble after their raids into Southwest Virginia (Crook and Averill).
The only force known to be in front of Sigel was General Imboden's mixed cavalry
and infantry command and the troublesome raider commands of Mosby and McNeil.
These combined Confederate forces, small as they were in size, completely
bamboozled the easily fooled Sigel who committed nearly every possible military
blunder during the course of this short campaign. |
 |
|
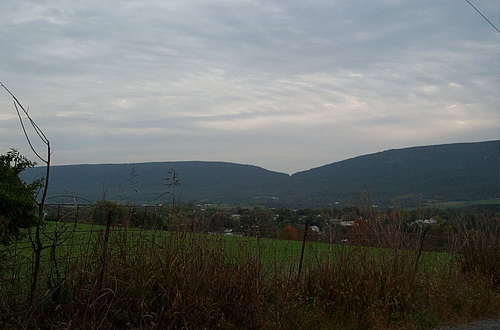
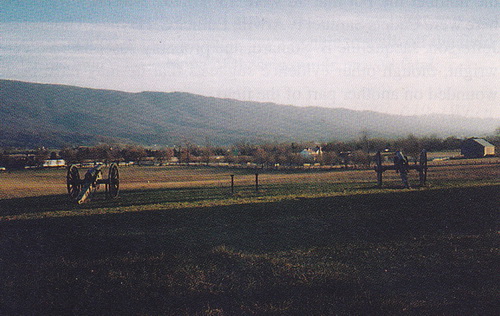
Photo #2 - This photo is taken about 50 yards back from
the crest and looks to the northeast and the prominent Luray Gap in
Massanutten Mountain. To get to this spot from I-81, exit at
New Market and take Virginia 211 west as though going to the main
battlefield park area. However, almost directly across from
the access road to the battlefield park is a frontage road going
south. Drive up this road until you reach a Virginia State
property sign that stands on the access road to the water tower.
The view spot for this photo was taken up the water tower dirt road
about 150 feet from the access road. Note that this road is
unpaved and deeply rutted. |
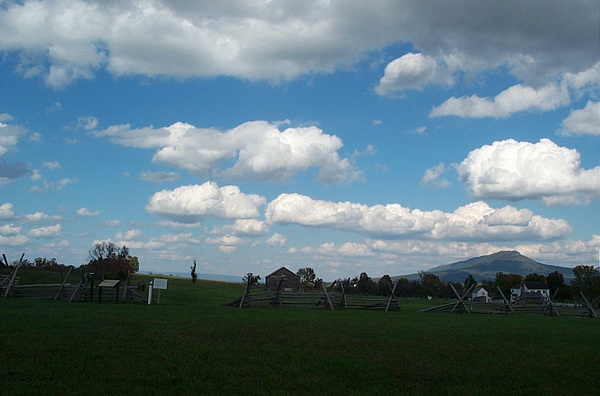 |
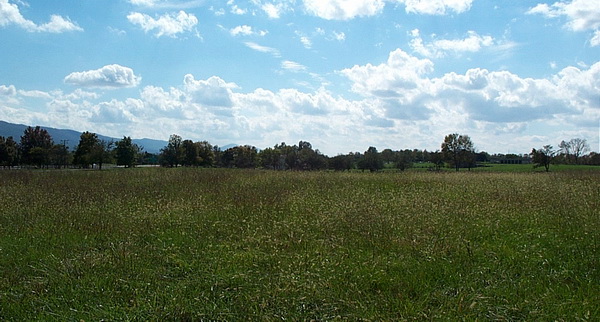
Photo #3 - This photo was taken from just outside the
visitor center at the battlefield site looking northeast. At
the far right and including the barn in the center is the Bushong
Farm. At the far left is the rise in the ground that anchored
Sigel's left flank. From left to right, just beyond the
Bushong barn, the Confederate line was Hart's Engineer Company,
Wolfe's 51st Virginia, Edgar's 26th Virginia Battalion, Clark's 30th
Virginia Battalion, Woodson's Missouri Company, and Ship's VMI Cadet
Battalion. Just beyond the Bushong farm to the east was
Smith's 62nd Mounted Virginia (mostly out of the photo). This
points out the disturbing fact that the Bushong Farm is the eastern
limit of the battlefield site which is bisected by I-81 and then the
New Market city limits. The corresponding Union units directly
opposite Confederate units in area shown in the photo are Carlin's
Battery D 1st West Virginia, Snow's Battery B Maryland Light, and
Wells' 34th Massachusetts supported by Curtis' 12th West Virginia in
rear of the two batteries. Overall, this is view incorporates
only one-third of
the actual engaged battlefield.
|
 |
|
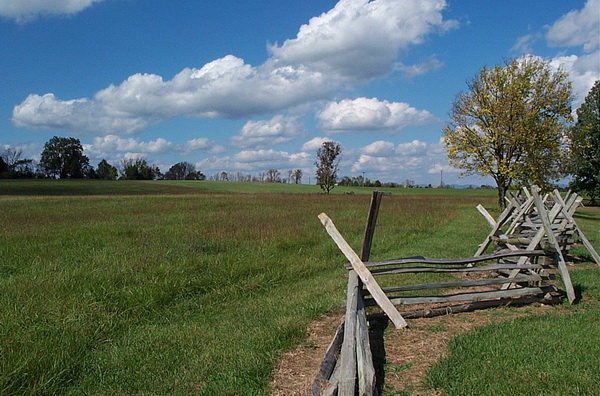
Photo #4 - Moving forward, from the area of the modern day
visitor center, Confederate infantry near the center of the line to
the right of the barn would be passing the Bushong Farm buildings
seen here. The VMI Cadet Battalion was still in the second
line probably 300 yards to the rear but still exposed to fire aimed
at the first line. Beyond the trees behind the farm building
is I-81 and the now expanded town of New Market. Back then,
that area was part of the battlefield. We will explore this
side in a few more photos and then go over to the other flank. |
 |
|
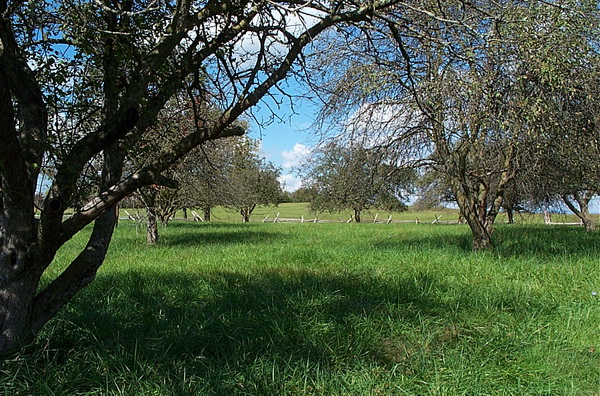
Photo #5 - Just to the near side of the Bushong Farm House in the previous
photo, I walked north along the side of the house, past the guest
house, and into the orchard. I angled to the northwest and
took this picture in the middle of the orchard with Bushong Hill in
the middle distance. If I were in the advancing Confederate
infantry line, canister would be heavy. The Confederates got
to about the fence line and halted to begin return musketry
primarily directed against the Union three batteries in front of
them: Carlin's and Snow's batteries on Bushong Hill and
Kleiser's battery partially hidden by the orchard trees but a lot
closer than the other two, approximately opposite the whitish
trunked tree and distant about 175 yards on a slight rise in the
ground. |
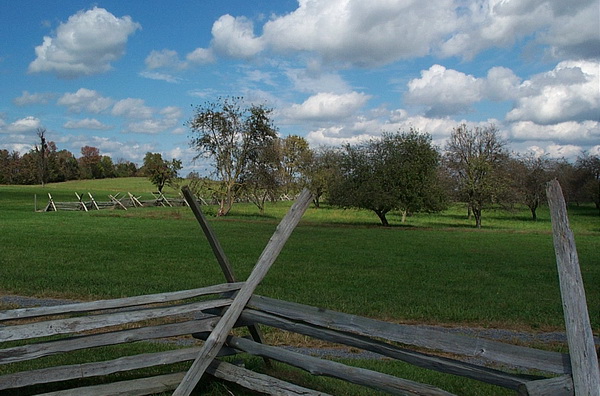 |
Photo #6 - Leaving the orchard and continuing our walk along the Confederate
line heading for the left flank on the North Fork of the Shenandoah
River, I stopped here to look back into the forward edge of the
orchard occupied by the 62nd Virginia Mounted Infantry Regiment and
the 1st Missouri now coming under deadly canister fire from three
Union batteries especially Captain Kleiser's 30th New York
Independent Battery, in which two of my namesakes fought: Lieutenant
Grasse who commanded one section of two 12-pounder Napoleons and
First Sergeant Frank E. Grasse, battery first sergeant.
This view is looking northeast towards the Union
infantry line held by the 34th Massachusetts and probably part of
the 1st West Virginia regiments. This particular spot was the
approximate position of the the 30th Virginia Battalion with the
51st Virginia Regiment to their left. These two units received
the brunt of Union artillery and musket fire. |
 |
|
Photo
#7 - Walking farther on, I stepped back to get an overview shot of what it
may have appeared to the 51st Virginia Regiment now on the extreme
left of the infantry line. The 26th Virginia Battalion was
behind it having been squeezed out of line as they moved against the
bend in the North Fork of the Shenandoah River(off to the left).
The battlefield park has several replica cannons to mark the
position of the various batteries and you can just barely make out
the gun line representing Carlin's and Snow's batteries just above
the white sign. Casualties were running high among the three
Confederate units occupying this ground between the river and the
Bushong House. Left to right, overall battle casualties were:
51st Virginia lost 14.7% (left), 30th Virginia lost (13.3% (middle),
and 62nd Virginia lost 20.5% (right). |
 |
|
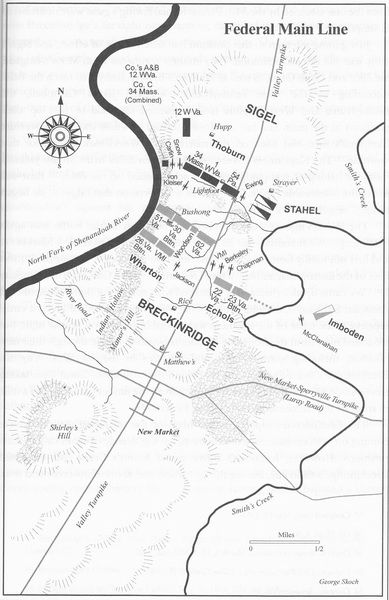
Battle Map - This map is taken from Valley
Thunder by Charles R. Knight, page 149. It shows the
overall situation described in my photo panels. Confederate
units are in gray, Union in black. The Confederate line has
been pinched by the river and shows the 51st, 30th, Woodson's
Missouri company, and the 62nd in the advance now stalled in front
of Union artillery and infantry on higher ground. Note that
the 26th Virginia Battalion is now in a second line with the VMI
Cadet Battalion supported by Jackson's battery. |
 |
|
Photo #8 - Heading west after a few paces, I encountered the edge of the
woods growing as a strip along the east bank of the North Fork of
the Shenandoah River. A few steps more and I reached the
walking trail shown above and took this photo aiming to the north or
Union positions. One of the great mysterious and the first of
Sigel's tactical blunders was assigning just one company of the 34th
Massachusetts here apparently believing that no sizeable infantry
force would attempt an advance through these thickets and maintain
order. As the Confederate line advanced and actually shortened
because of the bend in the river, the 26th Virginia Battalion and
Hart's Engineer company began to work their way into and along this
thicket line towards the Union position scattering what Union troops
were in their path. Eventually, and to their great surprise,
their advance in these rough and tumble woods brought them within
sight and easy musket range of the batteries of Carlin and Snow!
What a surprise this must have been especially not to have been
contested. They opened fire and started knocking down
gunners and horses. This was such a distraction that Carlin
rode over to Sigel to get help. Sigel says he ordered a
four-company battalion from the 12th Virginia Regiment who were
directly behind Carlin to advance into the thickets and drive off
the Confederates. He goes on to say in his report that these
men refused to advance. I'm not so sure that Sigel ever
directly went to the 12th or that he even ordered an aide to do so.
It probably never happened. The firing from the thickets got
pretty hot and, after the failed Union counter-charge, Sigel's
second tactical blunder, the guns were finally ordered out of the
line but several were unable to get away for lack of horses. |
 |
|
Photo #9 - I headed north along the river trail and in about 50 feet or so
turned left onto the overlook footpath. The whole width of the
thicket woods at this point is about 40 yards the rest of it being
on the steep slope defines the bluff overlooking the North Fork of
the Shenandoah River. This photo was taken at the overlook
looking northwest. The river flows north hence if you are
moving north along the valley you are are going "down" the valley.
This view gives you a pretty good idea what the thicket woods looked
like in May 1864. Sigel probably thought that his right flank
was absolutely secured at the bluff but he did not consider the
possibility of a line of thick skirmishers moving through it. |
 |
|
Photo #10 - Just farther up the river walk, I turned right (east) and came
out near this sight shown above which marks the general area of the
Carlin and Snow batteries. Unfortunately, I lost several
photos I took from this spot. The photo above was taken from
Blue & Gray Special Issue #4 on the Battle of New Market,
specifically from the General's tour section by Dave Roth and Lt.
Col. Keith Gibson, VMI. The Confederate line has been halted
and is deployed just in front of the barn at the far right and
extends along the fence line and the Bushong orchard. The VMI
Cadet Battalion is behind the Bushong Farm buildings marked by the
white house in the center right of the photo. von Kleiser's
battery of 12-pounder Napoleons just off the left of the photo down
in the swale opposite the Bushong orchard. The combination of
these 17 guns has stopped the Confederate advance and inflicted
enough casualties to force the several parts of the line to fall
back in disorder out of canister range. The VMI Cadet
Battalion is about to be committed to fill the gap. |
 |
|
Photo #11 - In this photo I took, Carlin's Battery D, 1st West Virginia, and
Snow's Battery B, Maryland Light Artillery, are on the high
rise of ground on the left, about 175 yards from this spot.
This is a representation of the position of von Kleiser's 30th New
York Independent Battery. This is what I call the swale and,
from the edge of Snow's battery and in a line along the rear of von
Kleiser and off the photo to the right is deployed the 34th
Massachusetts Infantry Regiment supporting the batteries.
Behind the lone tree in foreground but just on the other side of the
Bushong Hill rise about 150 yards to the rear is deployed the 12th
West Virginia. |
 |
|
Photo #12 - Walking up to the replica guns of von Kleiser's battery and
looking back towards the Bushong Farm is the field of fire of the
five 12-pounder Napoleons (one had been lost earlier in the day
having one of its wheels virtually shot off). This is canister
range. The open ground is a good part of "the field of lost
shoes" over which the VMI Cadet Battalion advanced. |
 |
|
Photo #13 - The lone tree seen in the previous photo marks the site of von
Kleiser's battery with Carlin and Snow on the rise to the far left.
This is the view that the right of the VMI Cadet Battalion and the
left of the 62nd Virginia had as they advanced against the Union
line. This advance was made just after another and most fatal
tactical blunder by Sigel, that of the disjointed advance of the
whole of the Union line. The chain of command from Sigel to
aides to the Union brigade commander, Thornton, and to each of the
three regiments was poor so that each regiment ended up attacking by
themselves and were easily repulsed one by one. On the heels
of that action, Breckenridge ordered the advance of the whole
Confederate infantry line including the VMI Cadet Battalion which
captured one of von Kleiser's Napoleons. Thornton's infantry
brigade and the artillery barely escaped with the help of
battlefield smoke and a Confederate halt. |
 |
|
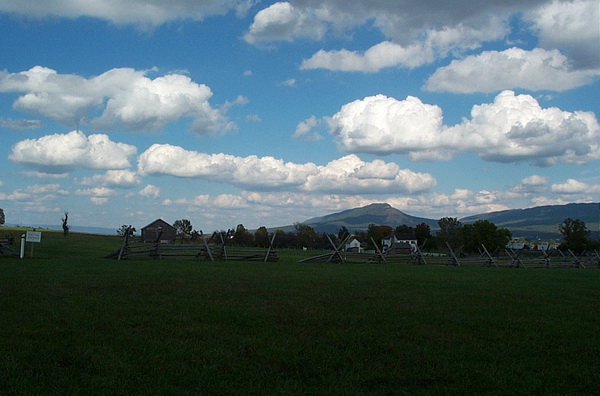
Photo #14 - As mentioned previously, the battlefield is
bisected by I-81. However, a pedestrian tunnel connects the
portions in the Bushong Farm area. Walking through the tunnel,
a footpath continues eastward but only for 100 yards or so.
Near the end of that path, this is a clearing from which I took this
photo showing the nature of the ground on the Union left held
largely by the 54th Pennsylvania Infantry regiment from the Valley
Turnpike just barely visible on the far right middle of the photo.
Going to the left, there is the prominent Knob of Short Mountain
with the white pinnacle of the 54th Pennsylvania monument just
below. This is the neighborhood of the far Union left.
Most of the Union cavalry was hidden in this area in the early
stages of the battle and from this general area, attempted a silly
"charge" against strong Confederate infantry and artillery posted
just behind this view on high ground. |
 |
|
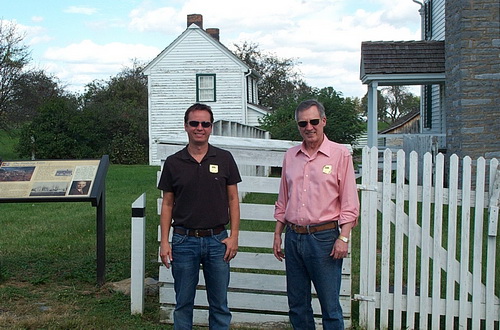
Photo #15 - A friend of ours took this photo of my son Scott and me
in the Bushong Farm complex. The farm house is on the left and open
for viewing. The Union lines are through the orchard. |
PHOTOS TAKEN IN OCTOBER 2012
--------------------------------------------------------------------------------------------------------------------------
REFERENCES and
BIBLIOGRAPHY
Collier, Mark C. Map-Packet for the
Battle of New Market. Harrisonburg, VA: Collier Mapping, 1996.
Davis, William C. The Battle of New
Market. Baton Rouge: Louisiana State University Press, 1983.
Davis, William C. The Day at New Market.
Harrisonburg, PA: Historical Times, Inc, 1971 and 1979.
Guerrant, Edward O. Reverend.
Operations in East Tennessee and South-West Virginia. Battles and
Leaders of the Civil War, Volume 4. New York: Thomas Yoseloff, 1956.
Holsworth, Jerry W. VMI at the Battle
of New Market. Columbus, OH: Blue & Gray Magazine, Volume XVI, Special
Issue No. 4, April 1999. This is a noteworthy magazine issue that includes
the VMI Cadet Battalion roster, walking tour narrative with color photos, and an
overall account of the battle including the days leading up to 15 May 1864.
Imboden, John D. The Battle of New
Market, VA, May 15th, 1864. Battles and Leaders of the Civil War,
Volume 4. New York: Thomas Yoseloff, 1956.
Knight, Charles R. Valley Thunder:
The Battle of New Market and the Opening of the Shenandoah Valley Campaign, May
1864. New York: Savas Beatie LLC, 2010.
GO TO?
© Copyright by George Grasse